How to set up the Health Report Outlook Mailer
 Posted by Mike
 Last updated: December 5, 2025
Microsoft’s Health Report add-in for Windows Server Essentials only allows the use of SMTP servers that support Basic authentication (i.e., authentication via a username and password) when enabling the sending of Health Report emails. However, since Microsoft no longer supports the use of Basic authentication with their Microsoft 365 and Outlook.com email services, you can no longer use Windows Server Essentials to send health report emails from those account types (i.e., from Microsoft personal, or organizational, accounts with email addresses ending in @outlook.com, @live.com, @hotmail.com, @msn.com, and Microsoft 365 email addresses).
The Health Report Outlook Mailer works around this limitation by extending the built-in health report emailing feature of Windows Server Essentials, thereby allowing you to use Modern (token-based) authentication to securely send emails from your Microsoft 365 / Outlook.com account.
INFO: The Health Report Outlook Mailer is made available as part of the WSEE Installer Version 10.0.14393.7876 (Revision 3) or greater.
This tutorial will show you all the steps needed to set up the Health Report Outlook Mailer so that you can start sending health reports from Windows Server Essentials using your Microsoft account.
Configuring a Microsoft Azure Account
To use the Health Report Outlook Mailer you will need to register an application in Microsoft Azure and make note of its Application (client) ID. In order to move forward with registering an application, you will need to create a free Azure account under the email address of your Microsoft account.
❗NOTE: While the Outlook Health Report Mailer does not require the use of any paid Microsoft services, Microsoft will require that you enter a credit card to set up an Azure account (to reduce spam signups). Within 30 days, your Azure “free” account will need to be moved to (Basic) “Pay as you go” pricing to continue being able to access the Azure services. However, since the App registrations service we’ll be using is a free service in Azure, you will not be billed anything so long as you’re not using any of the other paid Azure services.
NOTE: The email address you use when creating your Azure account must be a Microsoft-based email address with permission to send emails. The free App registrations service only works with Microsoft-based email addresses (e.g., email addresses ending in @outlook.com, @live.com, @hotmail.com, @msn.com, and Microsoft 365 email addresses; including those managed by Exchange Online). If you’re using Exchange Server, only paid Microsoft 365 / Outlook.com accounts can use a domain-based ‘From email’ address (e.g., my365user@whatever.com).
INFO: If you are using a paid Microsoft 365 / Outlook.com account with a domain-based ‘From email’ address, you will need to configure the SPF and DKIM values. Please see Microsoft’s SPF documentation and DKIM documentation for further information.
If needed, you can create a free @outlook.com email account here, and if you need to create a new Azure account, click this link to sign up for a free Microsoft Azure account.
Next, you’ll need to open the Azure Portal if you’re not automatically redirected there.
Create an Application (client) ID
Once the Azure Portal is open, type App registrations in the search bar at the top of the page.
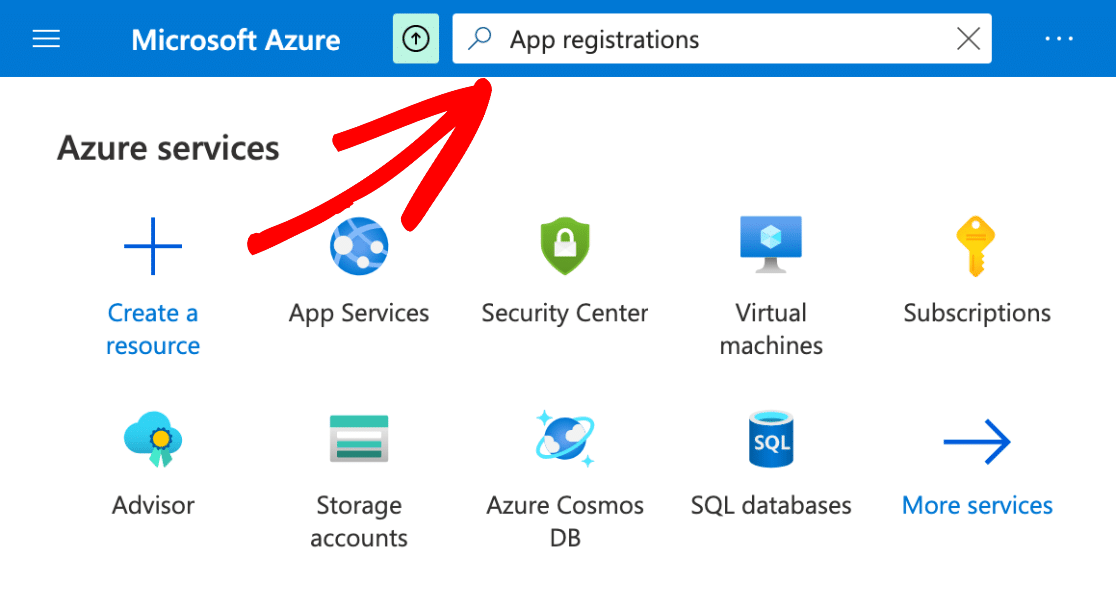
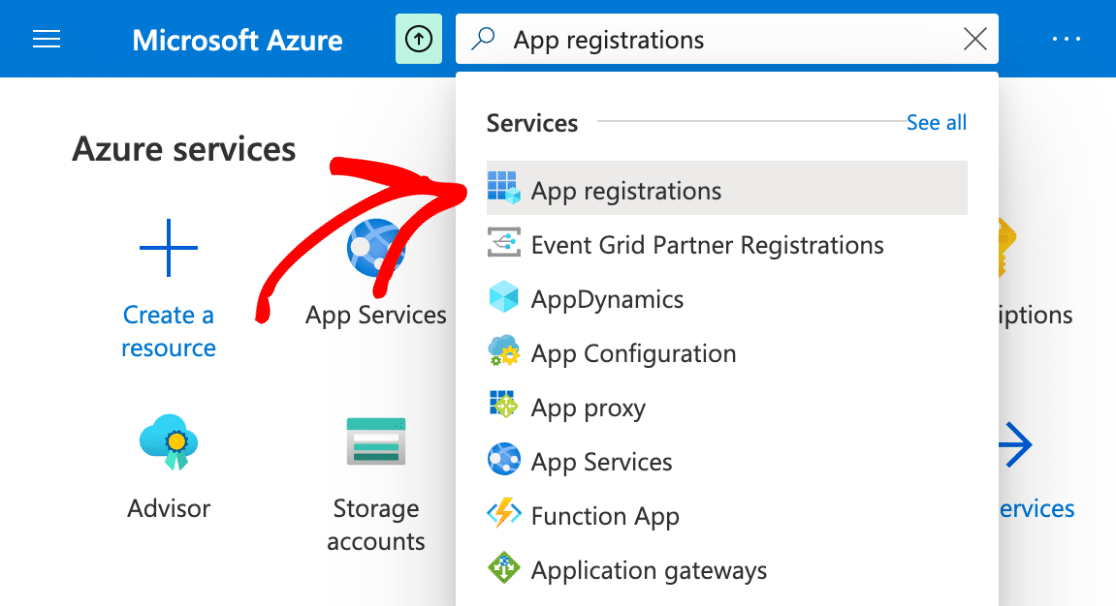
Next, you’ll see a dropdown menu with a list of services. Go ahead and click on App registrations.
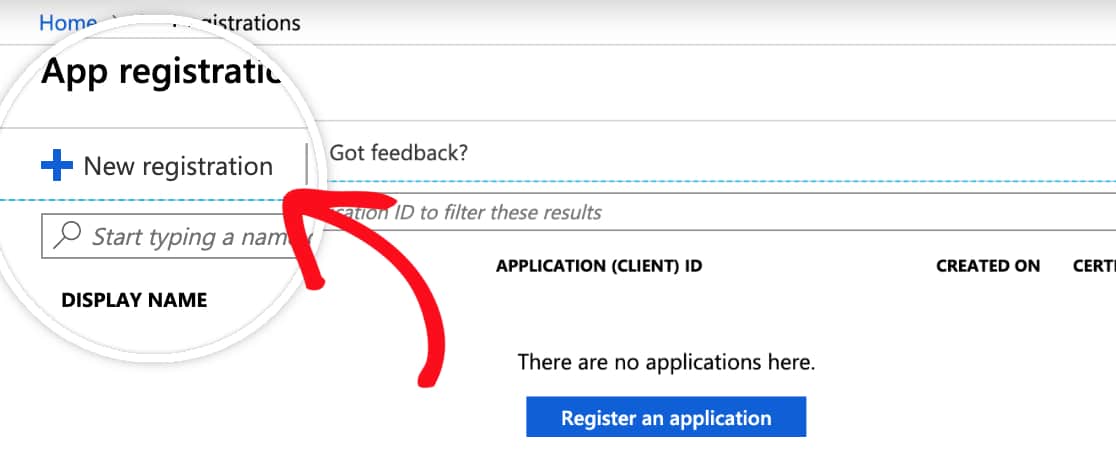
At the top of the App registrations page, you’ll need to select the + New registration option.
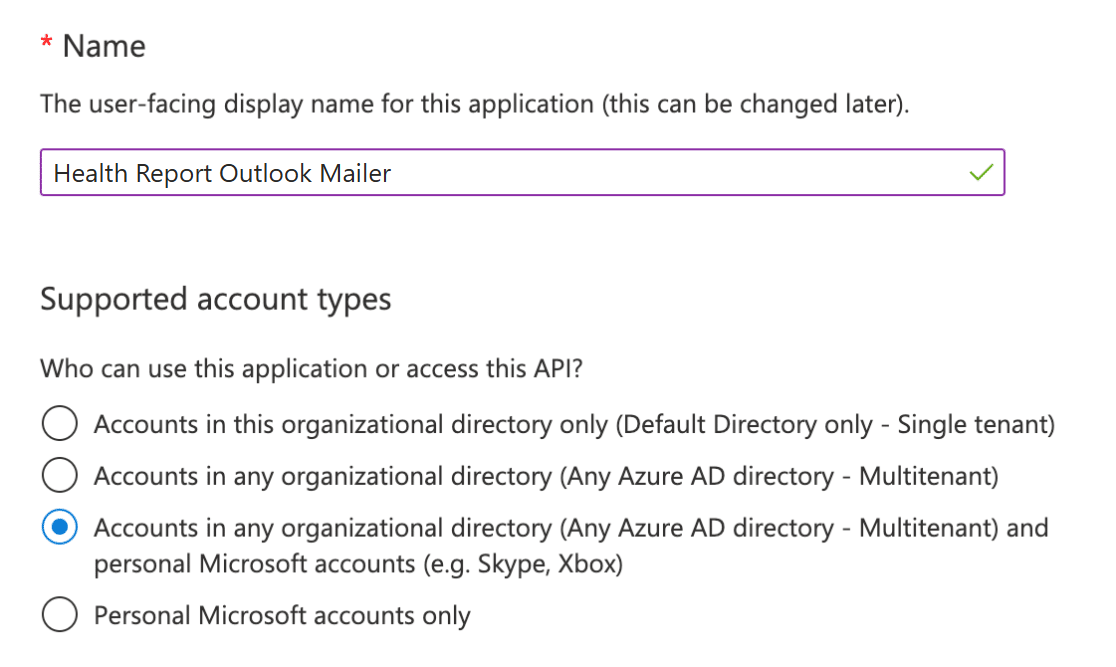
Here are the details you’ll need to fill out in the Register an application form:
• Name: We recommend naming it as: “Health Report Outlook Mailer“.
• Supported account types: Select Accounts in any organizational directory (Any Microsoft Entra ID tenant – Multitenant) and personal Microsoft accounts (e.g. Skype, Xbox).
• Redirect URI: Select Public client/native (mobile & desktop) from the Select a platform drop-down menu, and type (or copy and paste) in this URI: https://login.microsoftonline.com/common/oauth2/nativeclient
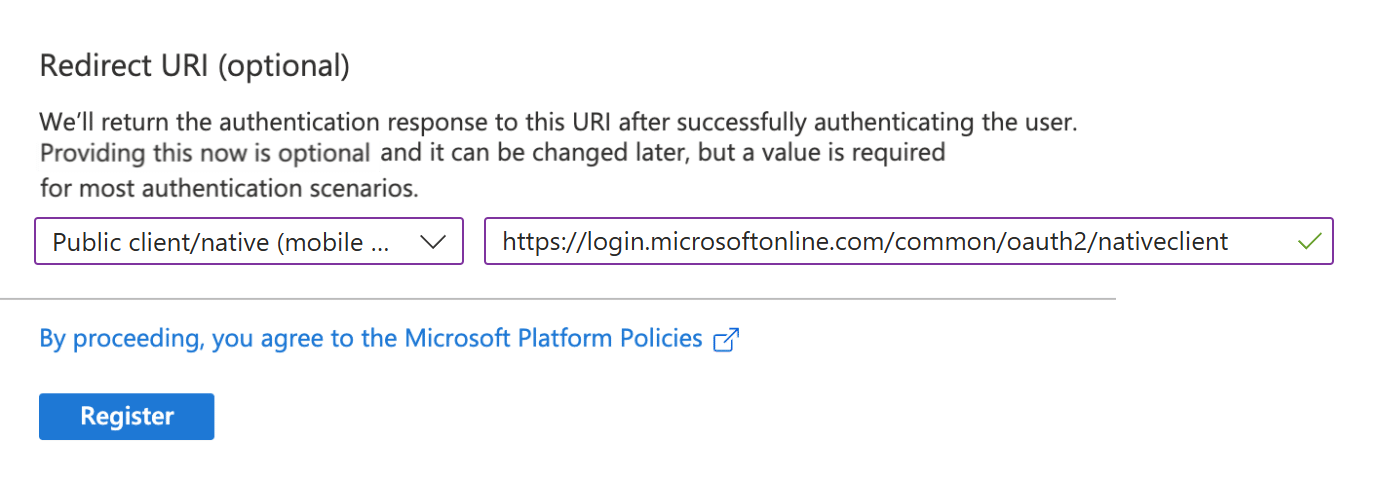
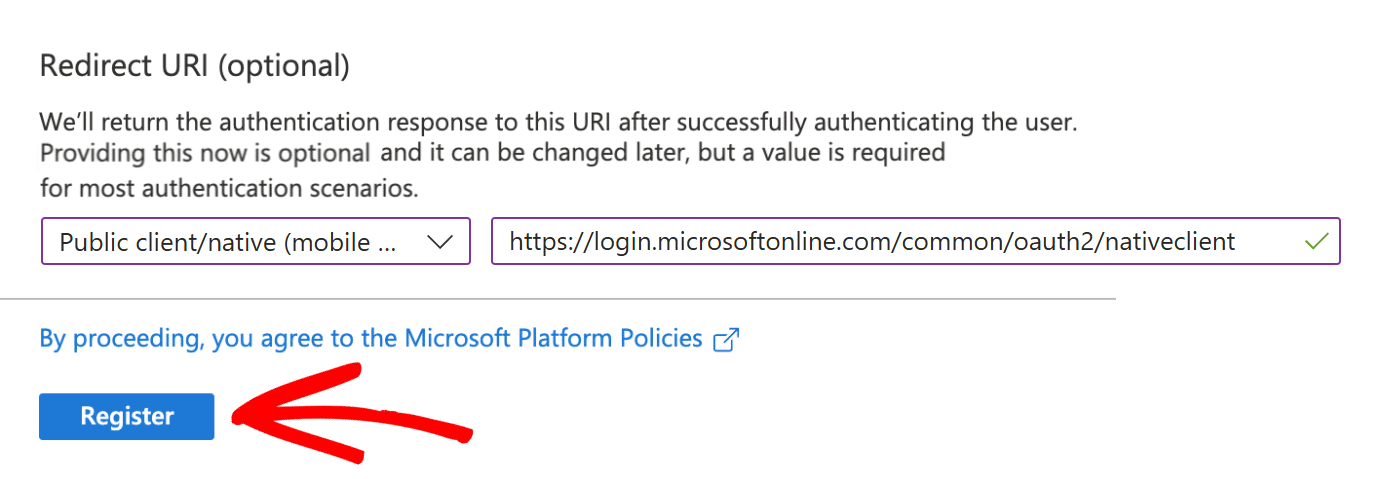
When you’re finished, click the Register button to proceed.
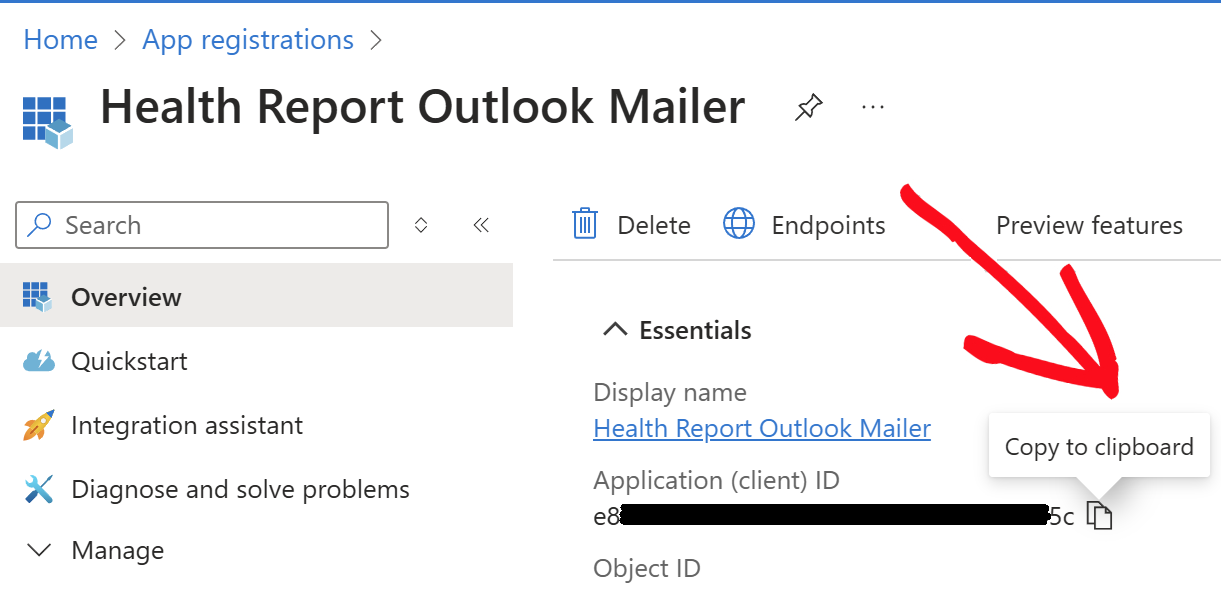
When the registration form is submitted, you’ll be redirected to the Overview page. Here, you’ll find your Application (client) ID. Go ahead and copy this value.
Saving Settings and Authorizing Health Report Outlook Mailer
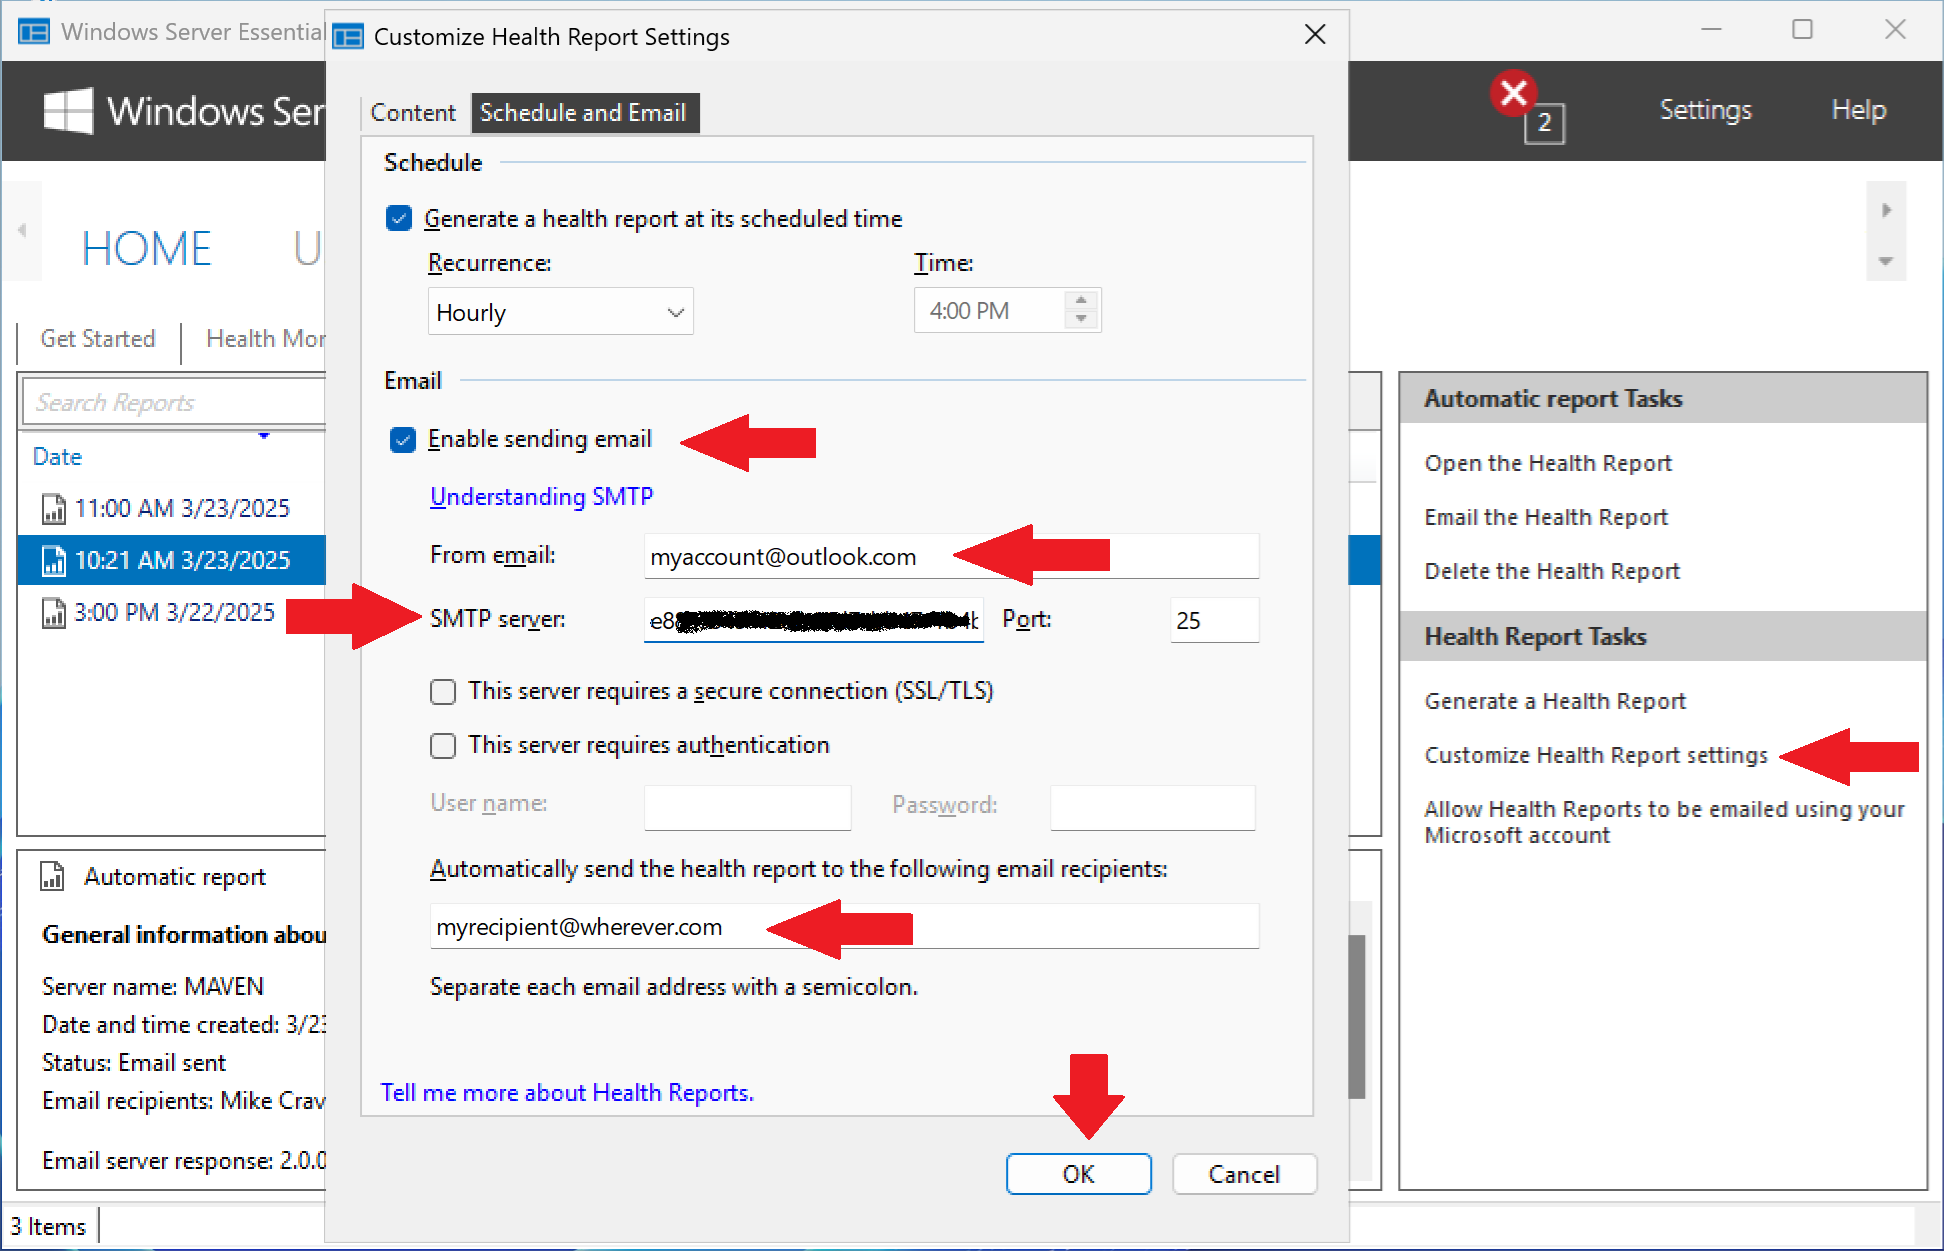
Once you have the Application (client) ID copied, you’ll need to open the Windows Server Essentials Dashboard, go to HOME → Health Report, click the Customize Health Report settings task, click the Schedule and Email tab, check Enable sending email, and paste this full value into the SMTP server field.
Enter the email address of your Microsoft account into the From email field, enter the recipients of the health report emails into the Automatically send the health report to the following email recipients field, and click on the OK button (none of the other fields are required).
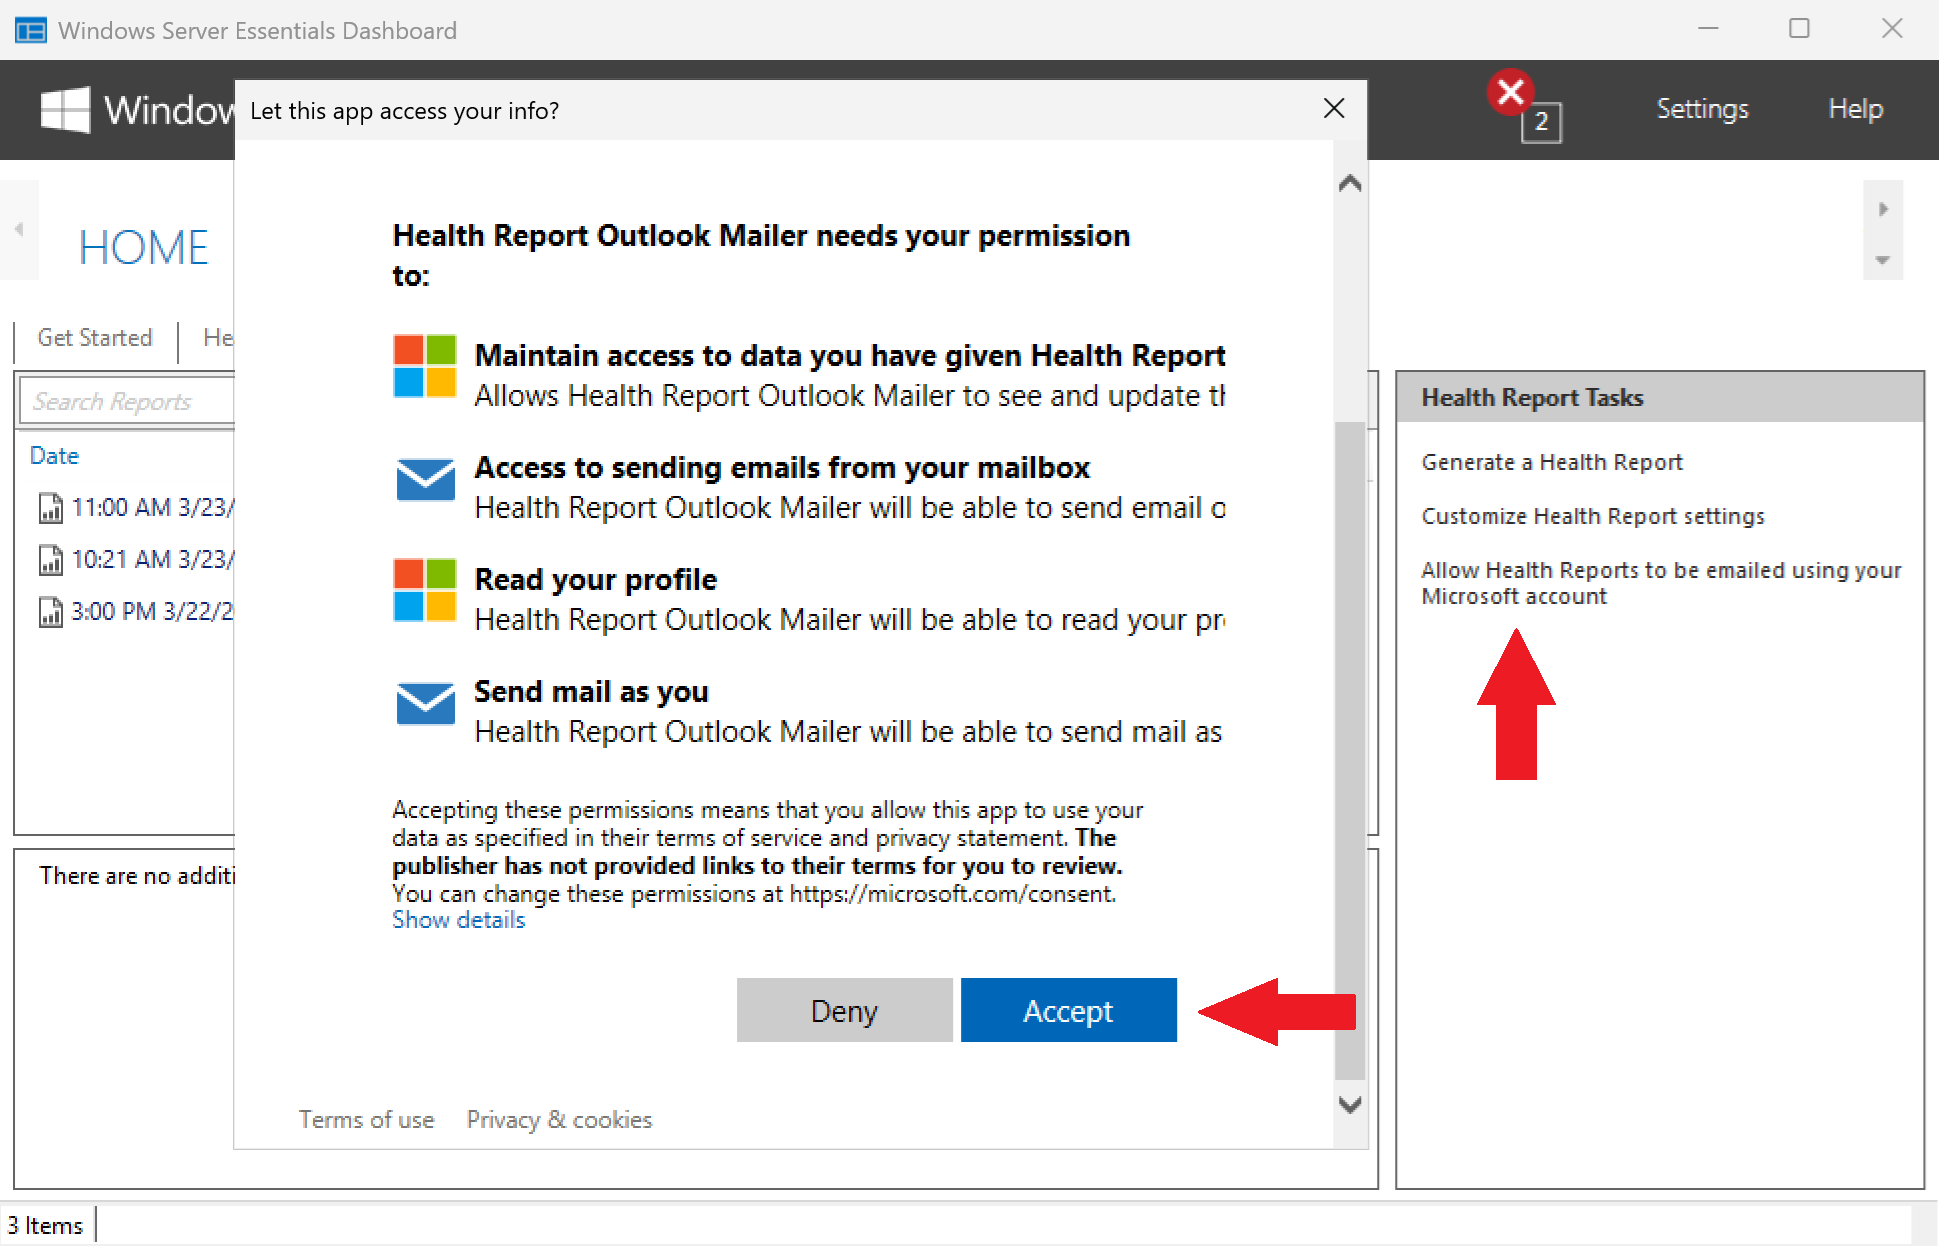
After you’ve saved the health report settings, you should see a task labeled Allow Health Reports to be emailed using your Microsoft account. Go ahead and click this task to authorize the Health Report Outlook Mailer to send emails, as you, from your Microsoft account.
Once you’ve clicked the task, a Microsoft account sign in form will be shown, and then a permissions request form after you’ve successfully signed in. At the bottom of the permissions form, click Accept.
That’s all there is to it! Your health reports will now be emailed to the specified recipients from your Microsoft 365 / Outlook.com account. Click the Generate a Health Report task to give it a try.
— MIKE (The Office Maven)
Mike says:
BTW, this was insanely hard to accomplish. I had to completely rewrite and extend the existing Health Report add-in and jump through a whole bunch of hoops to make this work. I should probably be charging extra for this functionality, but I’ve decided to just include it as part of the WSEE Installer.
JonnyManiac says:
This is superb Mike! Many thanks for doing this. I have really missed having daily report emails and really didn’t want to setup an SMTP service just for this. Thank you!
ArtinNC says:
I finally got this going. Thanks. The only issue I had was trying to set up a new Outlook.com email address. Years ago I set up my Microsoft account with my XXX.Mindspring.com email address and when I went to set up a new address, Microsoft insisted I log into that account. That account also had a very long outlook.com address attached to it so I figured I would use that as the sender address in WSE Health Report emails. But it was not recognized by Microsoft so I tried my XXX.Mindspring.com address and it seems to be working. Thanks again.